DIY Zara inspired tribal necklace with nuts and tapes
August 12, 2013
В одном из предыдущих постов я обещала показать мастер-класс моего колье, сделанного из гаек и тесьмы в стиле популярного украшения от Зара, сегодня я выполняю обещание :) Скажу честно оно мне очень нравится, его можно носить как летом, так и в более холодное время года и таким образом разбавлять скучные монохромные образы. Мое колье отлично держит круглую форму благодаря металлическому шнуру и этим оно мне нравится даже больше чем оригинал (к тому же в заре его цена была 250 грн :).
Очень бы хотелось услышать ваше мнение, дорогие!
In one of my previous posts I promised to show the tutorial of a popular Zara necklace made of nuts and tapes, totay I'm keeping my promise ;) To be honest I really like it, it can be worn both in summer and during cold period of time adding some colour to the boring monochrome looks. My necklace keeps it form due to the metallized cable which it is made of and that's why I like it even more than Zara's (moreover the original piece costs more than $30 in my country).
I wanna hear your opiniaon about this DIY, dears!
 |
| DIY Zara inspired necklace |
 |
| Tutorial : DIY Zara inspired tribal necklace with nuts and tapes |
Follow me
Оригинал ожерелья Зара:
 |
| Original silver plated Zara necklace with fabric pieces |
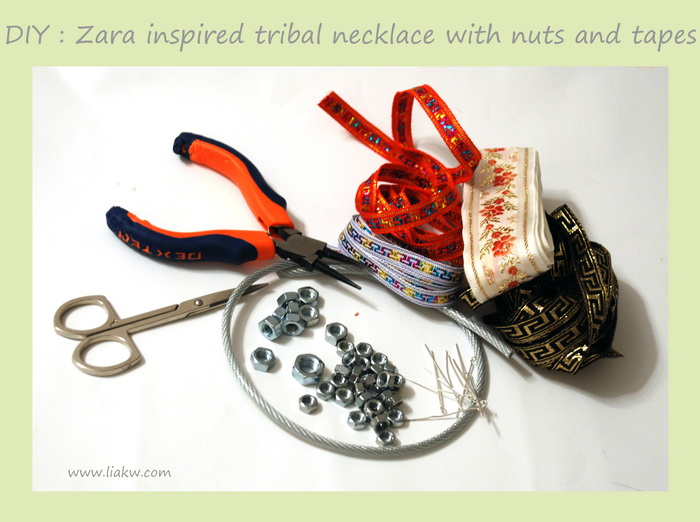
1. Нам понадобится : металлический кабель в силиконовой оплетке и гайки двух диаметров (все из магазина стройматериалов), тесьма разной ширины с орнаментом, клей, ножницы, круглогубцы, фурнитурные иголочки с петлей на конце.
You will need : metal cable in silicone cable armature and nuts in two sizes (everything from hardware store), tapes of different ornament and size, glue, scissors, round pliers, decorative needles with loop.
 |
| Tutorial : DIY Zara inspired tribal necklace with nuts and tapes |
2. Кабель необходимо разрезать на две неравномерные части, я это сделала спец. ножницами по металлу прямо в строительном магазине, дома вы такое не осилите :) Затем нанизываем гайки в том порядке, в котором ходите разместить тесьму : разделительные гайки меньшего диаметра, а те на которых будет тесьма - большего.
You should cut the cable in two parts (small and bigger one) with the help of special scissors that cuts metal (I've done it in the hardware store, because I don't have such at home). Than thread the nuts on a cables in the order you wish (the smaller nuts will be without tape in future, the bigger ones will be covered by fabric).
3. На концы кабеля нанизываем по две гайки малого диаметра (что бы они туго сидели и не двигались), а между ними закручиваем круглогубцами фурнитурную иголочку - это будет крепеж для застежки.
Put the pair of smaller nuts on the each end of cables and twist the needles with loop between it - it will be the fastener for the clasp.
4. Размещение разных ленточек необходимо продумать заранее, ширину и порядок следования. Берем первую тесьму и закручиваем вокруг центральных гаек, концы обрезаем и скрепляем клеем.
The order of tapes should be thinked over beforehand, its width and placing. Take the first fabric and twist it around central nuts, cut the ends and fix it with a glue.
5. Я ту же черную ленту использовала симметрично и во втором ряду гаек. Таким же образом наматываем белую тесьму и заклеиваем.
I've used the same black tape symmetrically on the second nuts row.Twist the next white fabric the same way.
6. Продолжаем работу с красной лентой. На этом фото хорошо видно что между гаек я закрутила иголочку с петлей - это будет для соединения верхнего и нижнего рядов.
Next one - red tape. You can see on this picture that I've fastened the needle with loop on the rows, it will help to connect them both.
7. Все ленты намотаны, иголочки с петлями предусмотрены на двух кабелях.
All tapes are twisted and fasteners are proveded.
8. Скрепляем два ряда с помощью колечек продетых через петли.
Connect the rows with the help of rings run through the loop.
9. К сделанным в пункте 3 петлям крепим цепочку и карабин - застежка готова!
Fasten the chain and a clasp on a loops made in point 2.
10. Все, колье готово! Как я уже говорила благодаря гибкому эластичному кабелю оно держит форму в застегнутом состоянии, а когда карабин раскрыт - опять расправляется в горизонтальное положение.
That's all, the necklace is done!
Весь аутфит пост с этим хендмейд колье вы можете найти здесь!
Find the full outfit post with this DIY necklace here!
 |
| Street fashion mixing prints outfit with aztec dress and tribal diy necklace |
Надеюсь вам понравился моя версия колье от Zara!
Hope you liked my version on Zara's necklace!


10 коментарі
чудесная идея! замечательный мастер класс!!!у тебя да же получилось лучше)))
ReplyDeleteОго! отличная идея!
ReplyDeletemary2be.blogspot.com
Идея просто суперская!Ожерелье получилось безумно хорошо)
ReplyDeleteklassnoe kol'e!!! ymni4ka))))) vsegda nravyatsya tvoi "diy", spasibo 4to delishsya)))) xoxo)))
ReplyDeleteОтлично, и не отличишь! А какое шикарное красное платье!!!!
ReplyDeleteХорошего дня!
Vibrant, fun and very pretty
ReplyDeleteЗдорово!Очень красивое колье получилось!
ReplyDeleteAmazing DIY i have to try it. Love your dress as well.
ReplyDeleteStyle and Paper
Super cool! I actually really like it with just the bolts too!
ReplyDeletehttp://lasaloperie.blogspot.com
This is one of a kind necklace- great job Irina. Super!
ReplyDeletewww.impromp-two.blogspot.com